Physical Address
304 North Cardinal St.
Dorchester Center, MA 02124
Physical Address
304 North Cardinal St.
Dorchester Center, MA 02124
Reading time: 8 minutes
Most permanent outdoor lighting fails because of cheap adhesives, poor power management, or inconsistent spacing that creates distracting "hot spots" on your home. To fix these issues, you must transition from seasonal DIY methods to professional-grade mechanical fasteners, hidden power supplies, and layouts designed specifically for your home’s architecture.
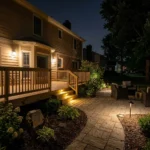
Permanent outdoor lighting, often called roofline or architectural lighting, is one of the best ways to upgrade your home in Lexington. It eliminates the annual chore of hanging holiday lights and provides beautiful, year-round security and accent lighting. However, because these systems are meant to stay up for a decade or more, small mistakes during installation lead to big headaches down the road.
At Evening Glow LLC, we see these mistakes often when we're called out to repair or replace DIY systems in neighborhoods like Palomar and Beaumont. Here are the seven most common errors and exactly how to fix them.
The most frequent mistake homeowners make is trusting the 3M tape or adhesive backing that comes on many "smart" light strips. While these adhesives are strong initially, they are not designed for the Central Kentucky climate. Between our humid summers and the freezing winters in Richmond or Versailles, the cycle of expansion and contraction eventually causes the glue to fail.
The Fix: Use mechanical fasteners. At Evening Glow, we use custom-engineered tracks and mounts that are screwed into the soffit or eaves. This ensures the lights stay perfectly straight and never droop. If you are doing this yourself, use outdoor-rated plastic or metal clips every 12 inches to support the weight of the strand, even if you use the adhesive.
Nothing ruins the aesthetic of a beautiful home in Nicholasville faster than a messy power setup. Many DIYers install their lights and realize too late that the power "brick" or controller is hanging mid-air or requires an ugly orange extension cord running up the side of the house.
The Fix: Plan your power source before you mount a single light. Ideally, you should tap into power inside your garage or attic and run the low-voltage lines through the soffit. This keeps the bulky components out of the elements and out of sight. Our permanent architectural lighting services prioritize "invisible-by-day" installations, ensuring that all wiring and power supplies are completely concealed.
")
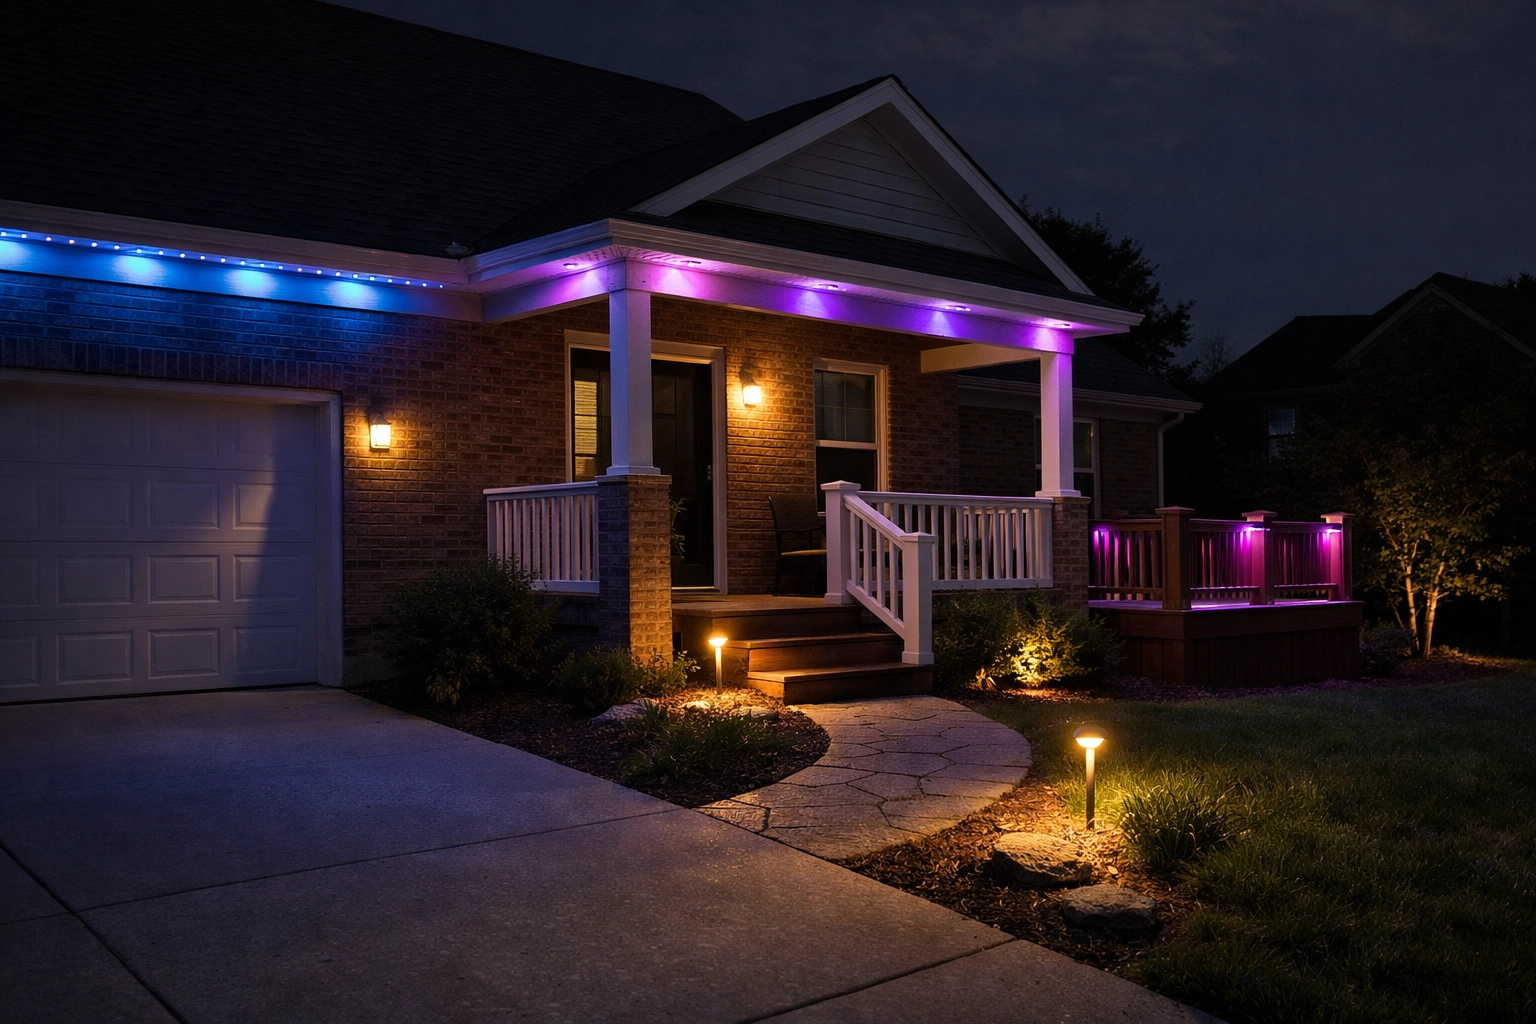
If you place your lights too close to the wall, you get "hot spots", harsh, bright circles of light that look more like a spotlight than a gentle wash. If they are spaced unevenly, your house will look lopsided at night. Professional lighting is about balance.
The Fix: Measure twice, mount once. Maintain a consistent distance from the vertical surface of your home (usually 2 to 4 inches depending on the lens angle). This creates a soft, overlapping "scallop" effect that highlights your home’s texture without blinding anyone looking at it. For homes with high peaks, we recommend using a layout tool or string line to ensure every diode is perfectly aligned.
Drilling into your home requires caution. We’ve seen DIY projects where homeowners cracked their vinyl siding or caused wood rot by not sealing holes in wooden fascia boards. In Lexington, many newer homes use thin aluminum soffits that can easily strip out if you use the wrong screws.
The Fix: Always use high-quality, corrosion-resistant hardware. If you are mounting into wood, a tiny dab of clear outdoor silicone in the screw hole can prevent moisture from seeping in. If you have aluminum or vinyl, use specialized zip-screws or mounting tracks that distribute the weight across a larger surface area to prevent sagging or damage.
")
A major mistake is choosing a lighting system that looks like a cluttered mess during the day. White tracks on dark trim or exposed wires running across shingles are common eyesores. Your lighting should be something you enjoy at night, not something you regret looking at during lunch.
The Fix: Color-match your tracks and wiring. We provide custom-colored channels that blend seamlessly with your home's trim. When done correctly, the system should be nearly impossible to see during the day. This is particularly important for homes in strict HOAs throughout Central Kentucky, where visible "holiday-style" wiring might lead to a violation notice. You can check our portfolio to see how we hide our systems.
Many homeowners try to "daisy-chain" too many lights together. Every controller and power supply has a maximum wattage or "pixel" count. When you exceed this, you’ll experience flickering, dimming at the end of the run (voltage drop), or a complete system failure.
The Fix: Check the manufacturer's specs for the maximum run length. If you have a large estate in Versailles or a sprawling ranch in Lexington, you will likely need multiple power injection points. This involves running an extra power wire to the middle or end of the strand to ensure every light gets the same amount of "juice." If this sounds complicated, it’s because it is, this is often where a professional maintenance plan or professional installation pays for itself.
Central Kentucky experiences significant temperature swings. Materials like plastic tracks and even the copper inside your wires will expand in the July heat and contract in the January cold. If your installation is "too tight" with no room for movement, the tracks will buckle or the solder points in the lights will snap.
The Fix: Leave small gaps (about 1/8th of an inch) between sections of mounting track. Do not pull your wiring drum-tight. A little bit of "slack" (hidden inside the track) allows the system to breathe as the seasons change. This attention to detail is why we are able to offer a lifetime warranty on our installations, we build them to survive the Kentucky weather.
")
Installing permanent lighting isn't just about sticking lights to a roof. It’s about understanding the architecture of homes in our region. A limestone-front house in Palomar reflects light differently than a brick home in Nicholasville.
As a veteran-owned business based right here in Lexington, Evening Glow LLC focuses on precision. We don't just "hang lights." We design systems that enhance your home's security and curb appeal while remaining completely hidden when the sun is out. Whether you're looking for landscape lighting to highlight your Japanese Maples or permanent roofline lights for the holidays, we have you covered.
Can I install these lights myself?
Yes, there are many DIY kits available. However, most homeowners find that the "invisible-by-day" look and the electrical complexities of power injection are difficult to master without professional tools and experience.
How long do permanent lights last?
High-quality systems are rated for 50,000 hours. If run for 6 hours a night, they can last over 20 years. We offer a lifetime warranty to give our customers total peace of mind.
Will permanent lighting increase my electric bill?
Minimally. These systems use low-voltage LED technology. Running an entire house typically costs less than a few dollars a month in electricity.
Is the system smart-home compatible?
Absolutely. Most modern systems, including ours, are app-controlled. You can change colors, set schedules, and even sync them to music from your phone or smart home hub.
")
| Mistake | Quick Fix |
|---|---|
| Adhesive Failure | Use mechanical fasteners/screws |
| Messy Wiring | Run lines through soffits/attics |
| Hot Spots | Maintain 2-4 inch distance from walls |
| Damage to Home | Use corrosion-resistant hardware & silicone |
| Visible Tracks | Color-match tracks to trim |
| Voltage Drop | Use power injection on long runs |
| Buckling Tracks | Leave gaps for thermal expansion |
Don't guess on what your home needs. At Evening Glow, we design custom architectural lighting for homes across Central Kentucky. Click here to book a free, no-pressure design walkthrough and let's see what your property looks like at night.


")
")